Fun fact: the origin of the word is “pompon” (French!) but it’s a-ok to say and spell it “pompom.”
I can’t even remember what I was googling, but I came across this picture:
I can’t actually tell where it came from or who did it. But, I did find an artist who does very similar things: Troy Emery. Magnificent.
Anyway. Just wanted to establish that I wasn’t the first to think of gluing pompoms to fake animals.
Finding pompoms is easy. Walmart sells them (in regular and neon– I picked neon). Then I figured it’d be easy to find an animal to glue them to. Wrong. I thought maybe since it was close to Halloween I could find a spooky cat but all I found was a small bird statue. (put a bird pompom on it.)
Then I pulled out my trusty tacky glue and got to work.
First we had to sort the pompoms. I put all the smallest ones in a bowl.
Here’s what I had after the first round of gluing. The pompoms slid around a bit when I did large swaths of them. So I ended up breaking it up into a ridiculous number of gluing sessions.
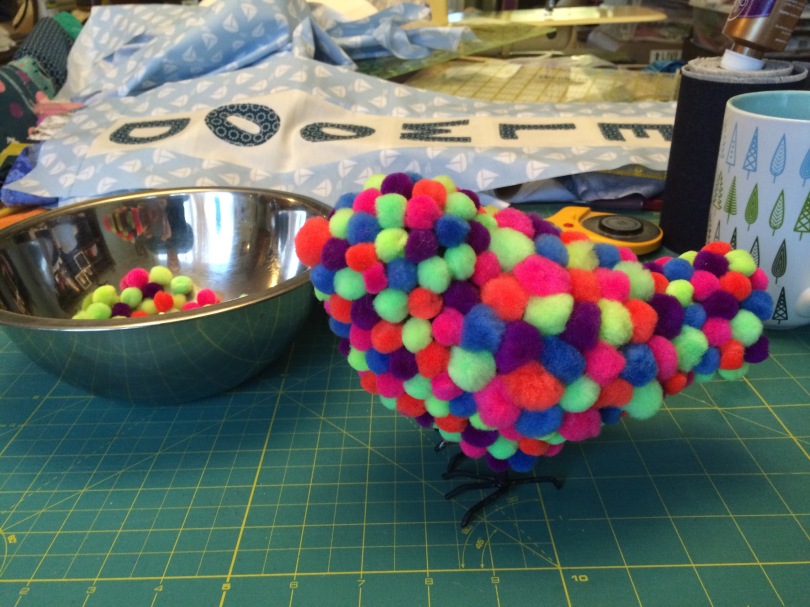
Here it is partially finished! I used slightly bigger pom poms where the wings would be. I tried not to get colors right next to each other. There’s really not so much skill in this (not like Troy Emery!).
And here’s the final product! I sent it to my brother and his fiancé since I know they’ll appreciate it! It’s pretty weird but don’t be surprised if I cover something else with pompoms! Color? Texture? Quirkiness Weirdness? Check!
I haven’t had a whole lot of free time lately… and the time I did have I was busy with secret projects. But this week I mailed 4 packages chock full of handmade goodness. I tried a bunch of new things too! I’m not so good at taking pictures while I’m trying to figure stuff out, but I think I’ll make it work… just gotta wait until things are delivered so I don’t spoil the surprises!
Today I was determined to make a pattern I picked up a week ago at the quilt shop: the Pearl pattern by Swoon. It’s pretty rare that I can sit down and get something done, start to finish, so that was my goal. AND, only use what I had on hand! I bought it before I knew much about it, so when I got home I opened it up and started reading through the directions. I just did NOT get it. So I did some googling and hashtag searching. Turns out, this clutch has 2 main parts: the zipper compartment and the card slots. It’s put together in an interesting way: you actually make 2 separate pieces and stick them together! It looks so complicated but it’s really fairly simple.
First, I cut out all the parts. Here’s my pile-o-interfacing and fabric and pattern pieces. I used a couple scraps of Kokka canvas I’d been hoarding: pink scooters and blue cameras. The scooter print was fun to use for this– the scooters, the blue/purple polka dots and green stripes are all part of the same piece of fabric. It made the project look scrappy even when it wasn’t. For the inside I used a grey floral that just seems to go with everything.
I will say since I used such a thick exterior fabric the interfacing seemed like overkill. I could probably have skipped a few layers. Actually the pattern called for 2 different interfacings but then only used one. Next time I’ll use the lighter-weight interfacing.
The card pockets ended up really nice! You make 1 wide card pocket and then cut it in half! Worked great!
There are a lot of instructions and clear diagrams. I had a hard time picturing what was happening and why but I followed the instructions to a “T” and it worked out.
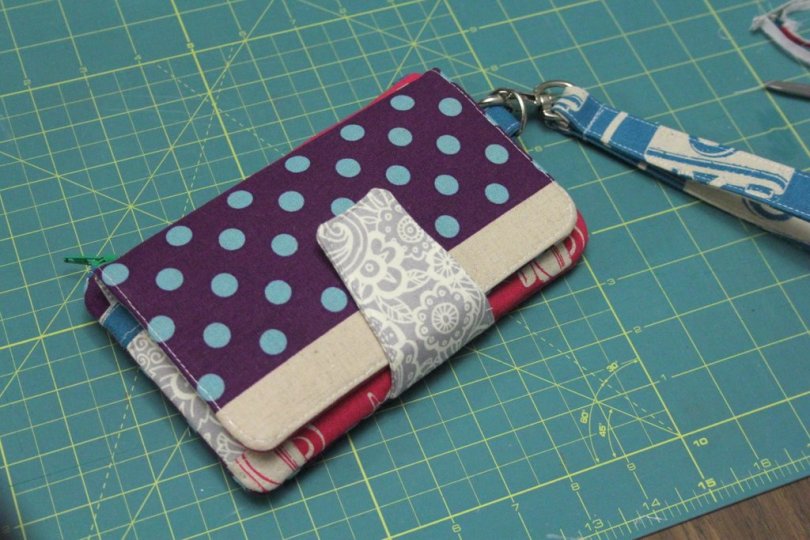
Here’s what I ended up with:
So, as for the 2-parts thing… The top/left half of the card slots is a separate piece from the zipper pouch and the lower/right card slots in the picture below:
I don’t think I could have lined up the tops and bottoms of the cameras like that if I had tried!
The pieces aren’t meant to be used separately, I think they’re like that for constructibility but also for lots of extra pockets and stiffness. I only explain because It’s just something I didn’t really understand until I saw a bunch of pictures.
In this picture you can see where the bifold portion fits into the sleeve on the main half. There’s even another magnetic snap in there to keep things together.
Anyway, turned out super cute and I’ve already transferred all my wallet stuff into my new wallet! Love that it’ll fit a phone in there too!
Well I had planned to tell you about a quick little project much sooner… but, like most things home-related, things took much longer to finish up than I had planned or guessed.
But today I have a freshly painted and face-lifted front door!
First, a little background. The door is in bad shape, no doubt about it. And if I was thinking, I would have replaced it before my house was painted… But I didn’t. The fake plastic mullions are broken and have yellowed with age, and the bottom is bent and rusting. Three summers ago I gave the door a little mini makeover– spray painted the mullions white, neutralized the rust and gave the whole shebang a fresh coat of paint. I even spray painted the doorknob with oil rubbed bronze spray paint (this method is highly controversial in blogland, but it held up great for me! I used some fine-grit sandpaper and a deglosser before spray painting)
Here’s a collage I made in 2012. Check out that yellowed plastic! Yuck!
I painted the door Benjamin Moore Agave and I loved it. The spring green looked great with the old brown-on-brown paint job.
Unfortunately, I had the house painted this summer and the agave color totally clashed with the new green trim!
I pulled out my trusty Benjamin Moore Affinity Colors paint deck and started testing options. Unfortunately I wasn’t able to find the one. So I went to the paint store armed with a few choices that were close. I didn’t find a paint chip that grabbed me, but the store was having a sale on their mis-tinted paint… and I found the perfect shade of purple. I got so lucky! A whole gallon of a good quality exterior paint for $3!
I followed the same steps as I did 3 summers ago, including neutralizing the rust and re-spray painting the mullions. They still looked great from the street but the paint was starting to peel a little, so I thought it was a good time to touch it up. Last time I wasn’t so careful with the masking… but this time I made sure to protect that new paint!
The next day I put the first coat of purple paint on!
I made sure to follow all the instructions on the paint can. The main requirements were the temperature has to be above 35 (check!), 2 degrees higher than the dew point and no rain in the forecast for 24 hours.
after the first coat…
It looked pretty good!
Until it didn’t.
Even though I thought I was in the clear, weatherwise, that evening it cooled off fast and everything was quickly covered in dew… within hours of painting.
In the morning I found little purple puddles in the mud room (I just left the door slightly ajar – this is the door to my mudroom, not my actual front door) and it looked like this:
Ack!
And then it rained. And rained. And rained.
What’s funny is that when I bought the paint, I told the cashier “yeah, I gotta get going on this before I run out of painting weather!” and he said “you’ve got a couple weeks left!”
Well it rained for at least 14 days straight (there go my “couple weeks”)!!!
Finally this past weekend I was able to finish this up. I gave everything a quick sanding (luckily it just looked worse than it was) and put on 2 coats of paint! And last night I installed a new (not spray painted) doorknob!
So there’s my “quick” front door makeover! And just in the nick of time– it’s almost too cold to paint these days! Mission for next summer: find a better light fixture!
One of the things I love most about living in Alaska is the extreme change in seasons. The days get noticeably shorter and the temperatures descend week by week.
Our winters are long and there are lots of chores to complete before the snow flies. This weekend I tackled a few.
First, I installed new weatherstripping around my front door. I went to check the mail the other day and it was getting dark. I had left the light on inside and as I went to go back in, I noticed all the light I could see through the gaps in my door! Yikes. No wonder it’s felt so drafty the past few winters!
The new weatherstripping is magnetic (high tech!). It was pretty easy to do. The pieces come longer than necessary and they’re trimmed to fit (just with kitchen shears). The pack I got had 2 sides and a top piece.
In the trim around the door, there’s a kerf, or groove in the trim that accepts store-bought weather stripping. So handy!
Here’s a handy graphic showing how it works.
While in the process of trimming the weatherstripping to fit my door, I ended up cutting a perfect cross section:
The tree shaped part is what is jammed in the groove. The magnet on the bottom seals to my metal door.
It’s not easy to take pictures of weatherstripping, but rest assured that magnetic strip is sealed tight against the door! (That’s the trim on the left, the weather stripping in the center and my door on the right)
Remember I told you I had plenty more posts about the Row by Row quilt I did?! Well, I wanted to expand a little on fusible web appliqué.
I use a product called “Softfuse.” You want to make sure whatever you use is meant to be stitched through, and I like Softfuse because it doesn’t feel like cardboard when it’s fused together.
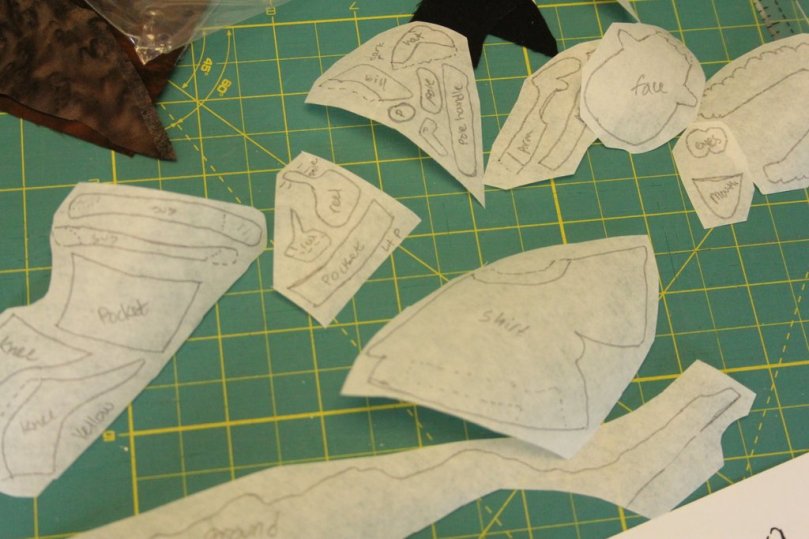
Most appliqué patterns come with 2 parts: a page of items to trace (usually reversed since the fusible web is applied to the back of the fabric) and a layout page so you can get the pieces put together correctly.
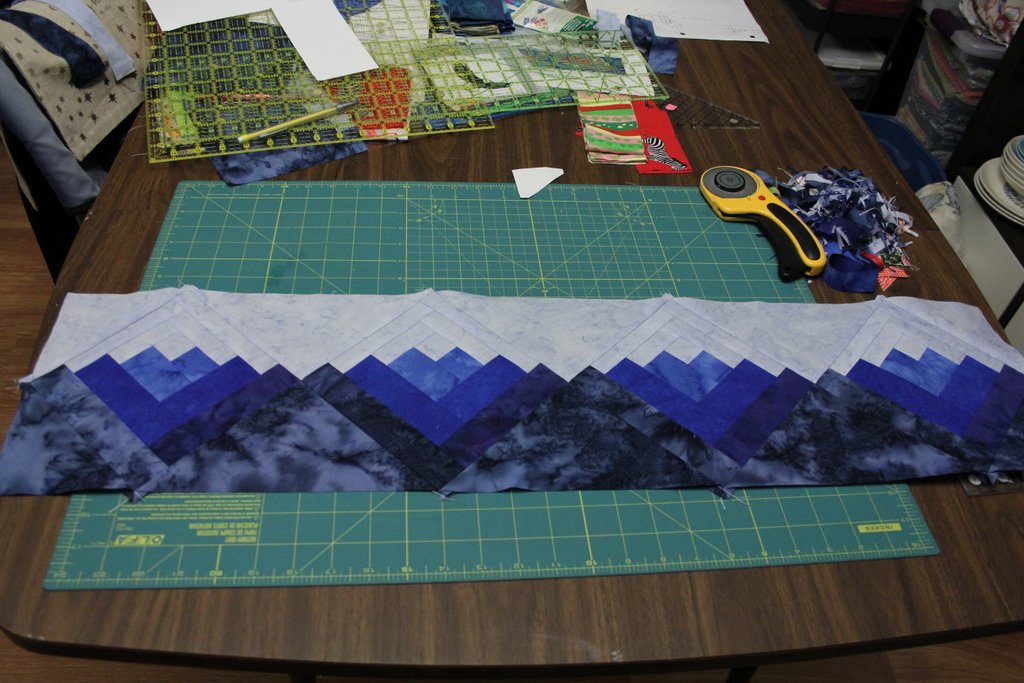
I trace the outline of each piece using a sharpie (use black and not colors!). Then I cut roughly around the shapes arranged by color. I fuse these to the corresponding fabric with a hot iron. Then, I turn on a good tv show and cut, cut, cut. I use a nice pair of scissors made for detailed fabric cutting. I splurged on them at Joann’s (with a 50% off coupon!). There was enough cutting for this quilt that my hands got a little crampy. Actually I just realized I had told someone (in a self-deprecating way) “eh, yeah, you just iron these things on…” Geez, I should have remembered how my hands felt when I trivialized the amount of work I put into this!
So here’s a shot from one of my cutting sessions– you can see my fine point sharpie, some bears, a tree and some dragonfly bodies I had already cut out. The dragonfly wings are waiting to be cut.
After everything’s cut out, you fuse it to the background fabric!
Love those fish!!!
Softfuse is soft but it doesn’t seem to hold up to much abuse, so you definitely should sew it down. I used an invisible thread (filament) for most of the blocks but I didn’t sew everything down. I kind of wish I had but I can always do that later if it bothers me. For now the quilt is hanging in my office! It makes a very colorful decoration!
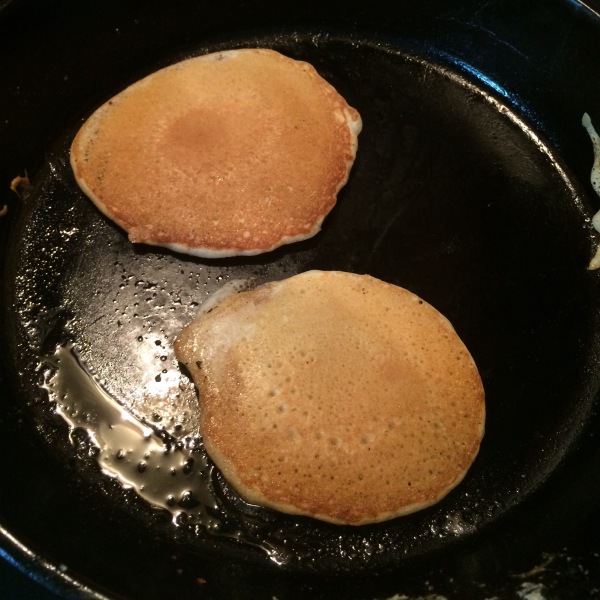
When I first started keeping sourdough starter I wasn’t sure I wanted to make bread all the time or if I’d like it that much (spoiler alert: I love it! Here’s some more info about my starter). But one of the first things I made were these sourdough pancakes and they sealed the deal; convincing me to keep a starter even if I used it for nothing but pancakes! That’s how good these are!
It’s funny, I read the recipe in a comment on a blog and I can’t even remember where. I’ve looked through so many sourdough pancake recipes and can’t find one that matches what I use. So I can’t give credit to whoever shared this with me. One thing I really like is it’s simplicity. It doesn’t require a lot of ingredients (I have it memorized by now) and is simple to throw together even if you’re not a morning person. Also I’m pretty flexible with how much starter I use, and they always turn out great.
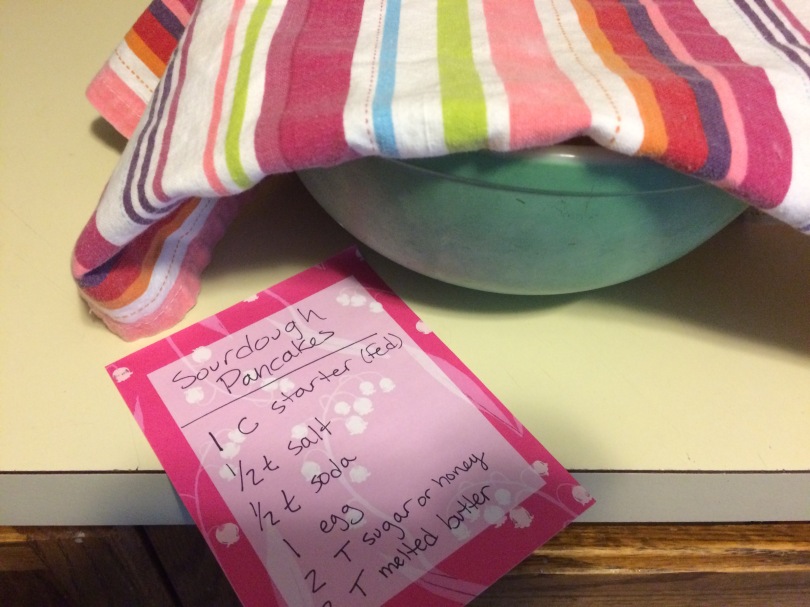
The recipe I saw made a lot of pancakes, so I wrote down the halved recipe and it’s a really great size. I make it for myself (and have leftovers) but I think it’d be good for 2 people too.
Sourdough Pancakes
1 Cup of fed starter
1/2 t salt
1/2 t soda
1 egg
2 T sugar or honey
2 T melted butter or coconut oil
I cook mine in my cast iron skillet. I melt the butter in the skillet while I mix up the other ingredients, and I add the soda last, which helps the fluff factor! The pancakes aren’t very tangy or sour, but have a thinner, chewier texture than say, bisquick pancakes. Enjoy!
I only posted about one of the blocks I made… but I’ve been busy!
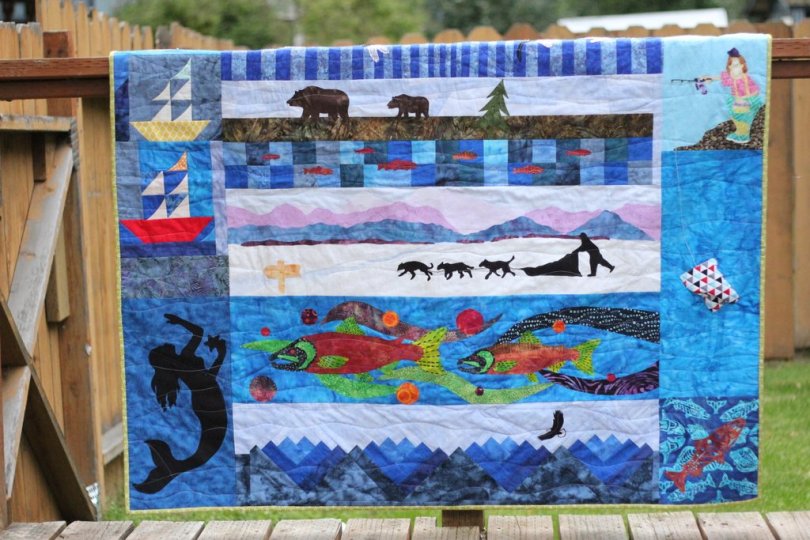
Finished quilt! I hung it on the rail of my deck, so the top 2 rows aren’t visible. It finished up at 54″ x 54″ square
I finished up 7 (and a half) other blocks, sewed them together and then quilted, bound and labeled a quilt! I only took a few pictures along the way (bad blogger!). I heard there was a prize if you’re the first to bring a finished quilt back to a participating store… so I didn’t mention it in the last post, but that was my goal. All week I’ve been watching the Row by Row facebook page and seeing people claim the prizes at the stores I visited, so I knew I had to move quickly. I wanted to wrap this up this weekend, and based on stores schedules (ahem, not open on sundays), I wanted to finish by Saturday morning. It really wasn’t much of a stretch until it came to hand-sewing the binding down. I’m not even going to mention what time I went to bed last night!
Anyway, this morning I brought the quilt to a local store (Quilted Raven, downtown Anchorage!) and claimed their prize! They were so sweet and they took my picture for their facebook page (and the Row by Row page). It was definitely a tiny mental challenge to bring in a finished quilt for people to look at (presumably people who were more accomplished and experienced quilters!). I don’t think I’ve ever put myself “out there” like that before, since usually the people looking at the quilt are my close friends/loved ones/recipients. I say “tiny” because I tried not to think about it too much and let it make me nervous– but I recognized the challenge and it felt good to breeze past it.
So now for the technical deets:
I quilted this quilt with a loose wave from side to side, using my walking foot and a blue variegated thread. The backing and binding were from my stash (woo! feels good to use what I’ve got!). I wasn’t sure how much backing fabric I had and it ended up being close to the perfect amount, so that was a happy accident. The print is from Tula Pink’s Saltwater line, which is one of my favorite designers and fabric lines (stay tuned– I’m working on a Saltwater quilt too!). The binding is a grassy green, which worked out nicely. I love a contrasting binding and this was just right!
I made the label by cutting a 6″ square and folding it in half diagonally. It was stitched down under the binding and then ladder-stitched down at the top (when I did the binding). I just used a sharpie. I’ve never labeled a quilt before (at least not by myself!) so I took the easy way. It’s funny I used that light-colored batik only to realize it looks like something I left in the bottom of my swim bag! Hopefully I always remember it’s the fabric and not stained and mildewed, haha.
Here are the stores I visited:
The left side: Quilt Zone, Anchorage and a silhouette of a mermaid I traced from a wall hanging in my house!
The right side: Seams Like Home, Anchorage and bits and pieces of Bearly Threaded, Cooper Landing
The center column, top to bottom:
Robin Place Fabrics, Soldotna
Swift Stitches, Talkeetna
Sew ‘n Bee Cozy, Seward
Sylvia’s Quilt Depot, Wasilla
Quilted Raven, Anchorage
Quilt Cache, Eagle River
I sure love shop hops! I’m looking forward to gathering more blocks (and making duplicates of the ones I’ve collected!) for wall hangings and table runners.
And I’d like to say an extra big thank you to the Quilted Raven!
Shew! Now on to the other projects (and housework) I’ve put off to get this one done!
Well… I told myself no more shop hops until I finish my existing projects… but then I decided maybe I wanted to make a Row by Row quilt.
Row by Row is a program where participating shops (across the US and Canada) each come up with a pattern for a row. Each row is a standard size (9 x 36). I think it’s a great size for wall hangings and table runners too!
The 2015 theme is water– so the blocks all have rivers, snow, fish, etc. You might not know this about me but I love all things water! I love to swim, I love the Great Lakes (and ok, oceans), I love mermaids, and even my job pertains to clean water!
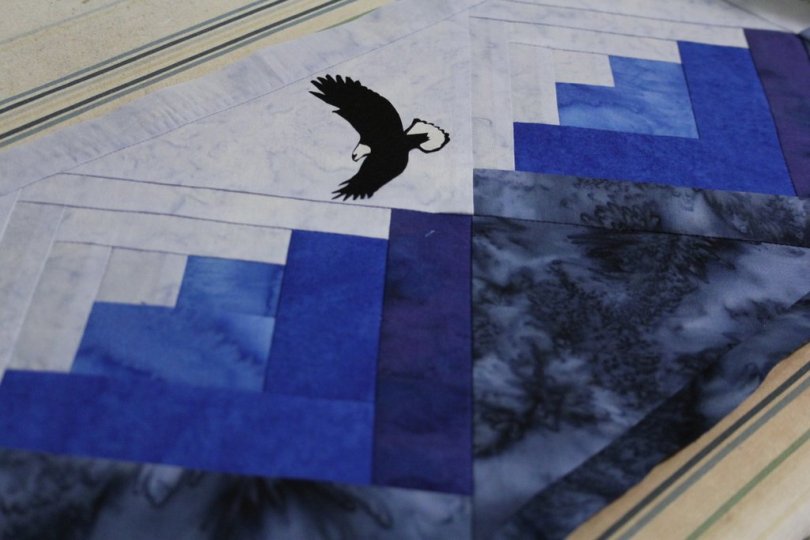
Curvy log cabin block
Here’s part of the first block I did. There are pieced blocks and applique blocks but pieced blocks are my favorite! This one is made of “curvy log cabin” blocks. There’s a ruler you can buy… but you know me and rulers/templates! I set out to figure this one out on my own. It’s called curvy because unlike a traditional log cabin block, where all the strips are the same widths, there are narrow strips and thick strips. It’s not easy to see here but it makes something pretty close to a quarter circle. So people make circles and ice cream cones and all kinds of curvy-looking things out of these blocks.
To make my own curvy block, I counted the number of strips/squares (across the middle) and then divided the finished size by that. Then, to make half of them thick and half thin, I added .25″ to half of the strips, and subtracted .25″ to half. So for this block, I counted 6 strips across. Since I wanted it to finish at 6″, that’s 1″ per strip finished or 1.5″ with seam allowances. I cut the thin strips at 1.25″ and the thick at 1.75.”
I think I did ok, but the instructions called for a 6-inch curvy log cabin block, so I made it 6″ finished… and the corners ended up getting chopped off! They must have meant 5.5″ finished, 6″ unfinished. I should have gone back and changed the setting triangles (or noticed the problem before this point), but it was a kit and I really didn’t have enough to go back. Anyway, most people won’t notice but it made me wonder if I should have gotten the ruler after all (but I have one less ruler in my stash so I’m still ok with it!).
The last step was to add a bald eagle flying over the waves! I used fusible web to applique it on. You can see a cut off corner here too
Anyone else go to a coffeeshop where they write AMOO on the cup to denote almond milk? Ha. Makes me giggle every time!
I spent a long weekend visiting my brother, sister-in-law and nephew on Vancouver Island recently. They live in such a beautiful place! And my nephew is such a cutie! He was 10 months old at the time. He’s crawling and getting into everything, but it’s fun to play with him and watch him figuring out the world around him.
My sister-in-law, Leanne, made homemade almond milk while I was there. Sometimes when you watch someone doing something it looks easy than it is… But this is just about that easy!
Leanne introduced me to Oh She Glows by a) mentioning recipes that sound delicious (i.e. Yam Enchiladas) and b) actually cooking them when I visit! Anyway, the almond milk recipe is another from Oh She Glows. And Leanne even sent me home with a mesh bag– it’s not a nut milk bag– that’s slightly stretchy and has nice, strong seams.
I was inspired by the almond milk and tried a little hazelnut milk too (with a little cocoa!). Both milks were delicious, even though the hazelnut didn’t really taste like nutella (maybe I can keep trying!)
I’ve heard you really have to find almonds on sale to make it more cost effective than just buying almond milk. But it’s fun, easy and delicious… and you know exactly what you’ve put in it! It might save you a trip to the store if you really want a bowl of cereal the next morning! 😉
Here’s another quick catch-up post about a fun trip I took this month. I’m so lucky that my parents come visit me so often, and that they love to explore this huge, amazing state with me! While it’s not actually in Alaska, I’ve always wanted to visit Dawson City, Yukon. So this summer, we went!
Here’s a shot from the Taylor Highway (Alaska side)… or maybe the Top of the World Highway (Canadian side). It’s all so beautiful! There was a lot of smoke from forest fires in this area so it was pretty hazy.
The road to Dawson City is mostly dirt but it was in good shape for our trip. The last leg of the trip was a quick ferry ride across the mighty Yukon River!
The day after we got to Dawson, we kept driving north! We drove to Tombstone Territorial Park along the Dempster Highway. The Dempster is another dirt highway that heads north past the arctic circle.
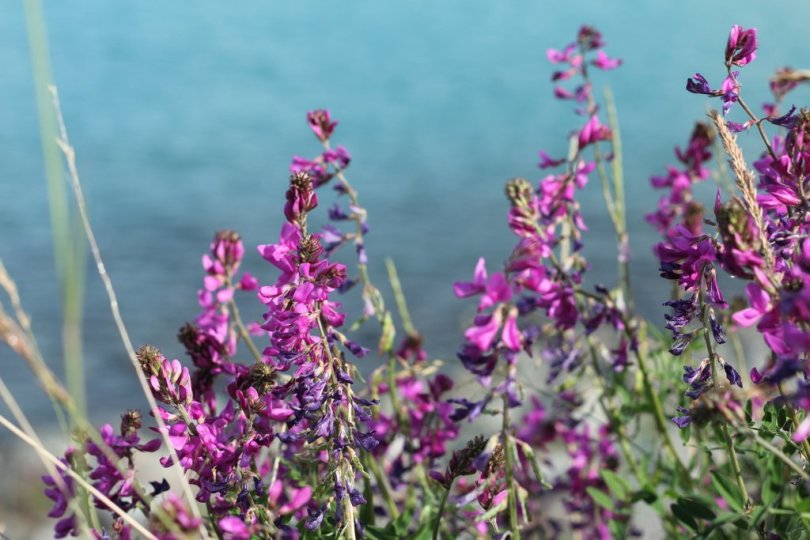
The center mountain is Tombstone Mountain.Here’s the view from Midnight Dome– an overlook right over Dawson City (though this pic is in the opposite direction from the city).Wild sage between Dawson and Whitehorse
We were flexible with our plans and ended up heading south to Whitehorse instead of going back the way we came.
Totem pole and forest fire smoke in Whitehorse
We made it to Whitehorse in time to take the brewery tour at Yukon Brewery! They have great beer! We checked out Miles Canyon and the next day we headed back north… to Alaska!
We saw a bear on the side of the highway!fireweed at Kluane Lake
It was a nice drive back. I moved to Alaska in March and I have driven to Haines in the fall, but I’ve never been on the Alaska Highway in the summer, so that was fun.
WHITE fireweed!
We had read about fireweed in the Milepost and learned it comes in purple, pink and white. It was then our mission to find this elusive WHITE FIREWEED and we did! So pumped! We also picked a few grocery bags worth of fireweed blossoms and mom made fireweed jelly when we got home.
It was such a fun trip and really great to spend time with Mom and Dad!